

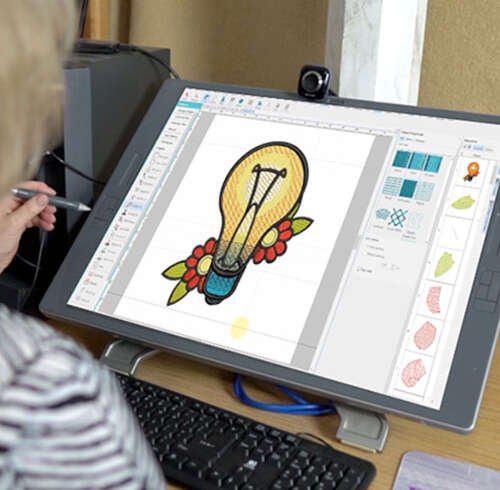

The Magic of Seeing Your Art Come Alive in Thread
There is something deeply satisfying about taking a pencil sketch off the paper and watching it transform into colorful embroidery. Your hand-drawn artwork carries a certain energy that clip art and stock images just cannot replicate. The uneven lines, the organic curves, the little imperfections that make your work uniquely yours, all of these can translate beautifully into thread if you know how to handle the conversion process.
Hand-Drawn Embroidery Design Conversion is the bridge between your sketchbook and your embroidery machine. It sounds intimidating, and honestly, it can feel that way at first. But with the right approach and a little patience, you will be stitching your own drawings before you know it. The secret lies in understanding how digitizing software interprets your artwork and how to guide it toward the best possible results.
Why Hand-Drawn Designs Are Worth the Extra Effort
Let me be straight with you. Converting hand-drawn artwork takes more work than digitizing a clean digital image. Your pencil lines have varying thicknesses. Your shading might be subtle. Some areas might be barely visible on the page. These are features in your artwork, but they become challenges during digitizing.
Here is the good news though. That extra effort pays off in a huge way. Hand-drawn embroidery stands out. It has a warmth and character that screams custom. You are not just stitching a generic design. You are stitching a piece of yourself. Whether you are creating gifts, custom apparel, or building a business around unique designs, hand-drawn artwork sets you apart.
Getting Your Sketch Ready for Digitizing
Before you even open your digitizing software, you need to prepare your sketch. This step makes or breaks the entire conversion process.
Start with a clean, high-contrast scan or photo of your drawing. A flatbed scanner works better than a camera because it eliminates distortion and uneven lighting. Scan at 300 DPI minimum. That resolution gives your digitizing software enough detail to work with while keeping the file manageable.
Clean up your scanned image in a basic photo editor. Remove any stray pencil marks, smudges, or background texture. Increase the contrast to make your lines pop. You want the software to clearly distinguish between the marks you made and the empty space around them.
Some artists prefer to trace over their original sketch with a fine-tipped marker before scanning. This creates crisp, solid lines that digitize much more cleanly than soft pencil strokes. If you choose this route, make sure your tracing stays true to the original character of your drawing.
Understanding What the Software Sees
Your digitizing software does not see your sketch the way you do. It sees pixels and contrast. It identifies areas of darkness and lightness and makes decisions based on those patterns.
When you load your hand-drawn design into the software, the auto-digitizing feature will try to interpret your artwork. It looks at each shape and assigns stitch types based on its analysis. Simple shapes become fill areas. Thin lines become satin stitches. Complex areas get tatami fills.
The problem with hand-drawn work is that your lines are rarely uniform. Some parts of a line might be thick enough for satin stitching while other parts are too thin. The software might misinterpret your intended shapes or combine areas that you meant to keep separate.
This is where manual editing becomes essential. Do not rely solely on auto-digitizing for hand-drawn designs. Use it as a starting point, then roll up your sleeves and refine the results.
Manual Editing Techniques for Hand-Drawn Art
Learning to manually edit your digitized design transforms your results from okay to outstanding. The basic idea is to guide the software toward what you actually envisioned.
Start by examining the auto-digitized result. Look for problem areas where the software made poor choices. Maybe it used the wrong stitch type for a particular shape. Maybe it missed a detail entirely. Create a checklist of issues and work through them one by one.
Adjust the stitch direction so it follows the natural flow of your drawing. For example, if you drew a flowing ribbon, the stitches should follow the curve of the ribbon rather than going straight across. This attention to detail makes your embroidery look more like your original sketch.
Refine the edges of your shapes. Hand-drawn lines often taper at the ends. Your digitizing software might make them blunt instead. Go into the node editing mode and adjust the start and end points of each stitch line to match your artistic intent.
Choosing the Right Stitch Types for Your Drawing
Different parts of your hand-drawn design need different stitch treatments. Understanding the options helps you make good choices.
Satin stitches work beautifully for the main outlines of your drawing. They are dense and create a raised, shiny effect that mimics the confident strokes of a pen or marker. For best results, satin stitches should be between 2 and 12 millimeters wide. Anything wider than that tends to look loose and gap-filled.
Fill stitches handle the larger areas of your design. Tatami stitches provide good coverage with minimal thread usage. They work well for background areas and large shapes. For a denser look, use a brick stitch, which packs more thread into the same space.
For your shading and detail work, consider using run stitches. These are simple single stitches that follow a path. They are perfect for creating the delicate lines and subtle marks that make hand-drawn art special.
Dealing with the Challenges of Pencil Shading
Pencil shading presents the biggest challenge in Hand-Drawn Embroidery Design Conversion. The soft gradients that look beautiful on paper do not translate directly to thread.
Instead of trying to replicate smooth shading, think about how to represent it through stitch density and color changes. Darker areas of your drawing can become denser stitching. Lighter areas can use more open fills or fewer layers.
Some digitizers create separate elements for each shade level and assign different colors. For example, a charcoal portrait might use five or six shades of gray, with each shade corresponding to a different density area in the drawing.
Another approach involves using different stitch angles to create the illusion of shading. Stitches that run parallel to each other in one area and perpendicular in another can suggest changes in value and texture.
Testing and Refining Your Design
This step is non-negotiable. Test stitch every hand-drawn design before committing to your final project.
Stitch your design out on the same type of fabric you plan to use for the final piece. Use the same stabilizer and thread. Then step back and look at the result with honest eyes.
Compare the stitched version to your original sketch. What translated well? What got lost? Maybe the delicate lines in the hair need to be thicker. Maybe the eyes need more contrast. Write down everything you notice and go back to your software to make adjustments.
Expect to go through several test versions before you are completely happy. Each iteration improves the design and teaches you something about how your drawing translates to embroidery.
Preserving Your Artistic Voice
The whole point of converting hand-drawn artwork is to preserve your unique style. Do not let the digitizing process sand down the edges of what makes your work special.
Consider simplifying details that do not digitize well rather than forcing them through the software. If you have lots of tiny cross-hatching in your original sketch, for instance, you might replace it with a single, well-placed satin stitch that suggests the same energy.
Embrace the limitations of embroidery as part of the creative process. Some things change when your art moves from paper to fabric. That is not a loss. It is a transformation. Your hand-drawn style carries through in the choices you make, the colors you select, and the way you guide the digitizing process.
Conclusion
Converting your hand-drawn sketches into embroidery opens up an incredible creative pathway. Yes, the process requires patience and practice. Yes, you will make mistakes and redo designs. But the reward of seeing your own artwork stitched out in beautiful thread makes it all worthwhile.
Start with simple drawings and work your way up to more complex designs. Practice manual editing until it feels natural. Test your designs thoroughly and learn from each result. Over time, you will develop an instinct for what digitizes well and how to guide the software toward your vision.
Your sketchbook is full of potential embroidery designs waiting to happen. Each one carries your unique artistic voice. With the right techniques and a bit of persistence, you can transform those sketches into stitch patterns that capture all the charm and character of your original artwork. Now grab your favorite drawing, fire up your digitizing software, and start transforming those pencil lines into stitches.