

Introduction
You have a beautiful logo, a detailed illustration, or maybe just a fun design you want to stitch onto a shirt. You load it into your embroidery machine, hit start, and wait for the magic to happen. But instead of a perfect replica, you get a tangled mess of thread, puckered fabric, and a design that looks nothing like your original image. Frustrating, right? This is exactly why professional Embroidery Digitizing Services exist. They are the invisible bridge between your artwork and your machine, turning pixels into perfect stitches. But what actually goes on behind the scenes? How does a skilled digitizer take a flat image and transform it into a file that your machine can read flawlessly? Let me walk you through the entire process, from start to finish, in plain, human-friendly language.
What Is Embroidery Digitizing, Really?
Let me clear up a common misconception right away. Embroidery digitizing is not just scanning a picture or running it through some magic filter. It is the process of converting artwork into a stitch file that contains all the instructions your embroidery machine needs to create the design . Think of it as translating a visual image into a language of stitches.
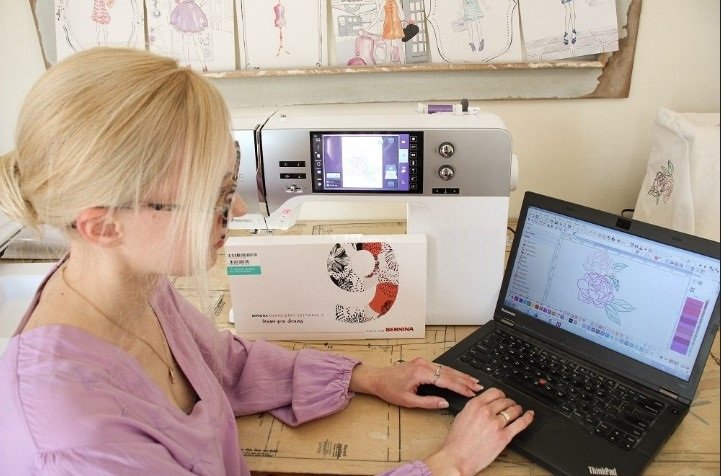
When you look at a logo on your computer screen, you see colors and shapes made of pixels. But your embroidery machine does not understand pixels. It understands coordinates, stitch types, and thread colors. A digitizer takes your artwork and redraws it using stitch objects . They decide where to use a satin stitch for a shiny border, a fill stitch for a large area, or a running stitch for fine details . They also determine the stitch direction, density, and order . Every single decision affects how the final design will look and behave on fabric.
So when a professional service delivers a PES or DST file, you are not just getting a file. You are getting a carefully engineered set of instructions that takes into account how thread behaves, how fabric stretches, and how your machine operates .
The Core Components: What Makes a Great Stitch File?
To understand how digitizers work their magic, you need to know the key components they manipulate. These are the building blocks of any embroidery design.
Stitch Type
This is the most basic decision. Satin stitches are used for narrow borders and lettering. They create a shiny, smooth finish . Fill stitches, also called tatami stitches, cover large areas with rows of stitches that look like woven fabric . Running stitches are single lines of stitches used for fine details and outlines . Choosing the right stitch for each part of the design is the foundation of good digitizing.
Stitch Direction
This controls the flow of the thread and affects the texture and shine of the design . Stitches that run in different directions reflect light differently, which can add depth and dimension. A skilled digitizer thinks about how the stitch direction will interact with the shape of the design.
Stitch Density
Density refers to how close the rows of stitches are to each other . Too dense, and the fabric puckers and the design becomes stiff. Too sparse, and you see the fabric underneath. Finding the perfect balance is a skill that comes with experience .
Underlay
This is the foundation layer of stitches that goes down before the top stitches . It stabilizes the fabric, prevents puckering, and helps the top stitches sit correctly. Think of it as the primer you apply before painting a wall .
Pull Compensation
This is a critical concept that separates amateur digitizing from professional work. Stitches are created under tension, which pulls the fabric inward . A digitizer compensates for this by making the design slightly wider or taller than intended. If they do not, a perfect circle on screen will stitch out as an oval .
The Step-by-Step Process
Now that you know the building blocks, let me walk you through how a professional digitizer actually works. This is the journey your artwork takes from a simple image to a perfect stitch file.
Step 1: Artwork Review and Preparation
The process starts with the digitizer looking at your artwork . They check the resolution, the colors, and the complexity. They look for elements that might cause problems, like tiny text, gradients, or overlapping shapes. If something is not going to work well in embroidery, they will suggest changes or clean up the artwork .
Step 2: Choosing the Stitch Types
Next, the digitizer assigns the appropriate stitch types to each element of the design . They decide which parts will be satin stitches, which will be fill stitches, and which will be running stitches. This decision is based on the size, shape, and purpose of each element.
Step 3: Setting Direction, Density, and Underlay
This is where the real technical work happens. The digitizer sets the stitch direction to create the desired texture and flow . They adjust the density to ensure full coverage without puckering . And they add the right underlay to stabilize the fabric and support the top stitches .
Step 4: Planning the Stitch Order
A good digitizer does not just create the objects and call it a day. They carefully plan the order in which the machine will stitch them . This minimizes jump stitches and thread trims, which saves time and prevents tangles. They also group objects by color to minimize thread changes.
Step 5: Adding Pull Compensation
As I mentioned earlier, pull compensation is essential for accurate stitching. The digitizer adjusts the shape of the objects to account for the fabric pulling under tension . This ensures that the final design matches your artwork perfectly.
Step 6: Saving the File
Finally, the digitizer saves the file in the format your machine requires, whether it is PES for Brother, DST for Tajima, or JEF for Janome . They also keep a source file, often a JAN or EMB file, which is the fully editable version they can go back to if you need changes .
The Human Touch vs. Automation
You might be wondering, why not just use automated software? There are plenty of auto-digitizing tools out there that promise one-click conversion. But here is the truth. No software can match the expertise of a skilled human digitizer . Auto-digitizing tools lack the understanding of material behavior, aesthetic judgment, and ability to solve problems that a professional brings to the table .
A professional digitizer thinks about your fabric, your machine, and your production volume. They know how to create files that run efficiently and stitch out beautifully. Automation can assist, but it cannot replace the human eye and experience that make digitizing an art form.
Conclusion
So, the next time you receive a perfect stitch file from a digitizing service, you will know the work that went into it. It is not just a conversion. It is a translation, a redesign, and an engineering feat all rolled into one. Professional digitizers take your artwork, break it down into its core components, and rebuild it using stitches that behave predictably on fabric. They account for tension, texture, and stability. They think about efficiency and aesthetics.
This is why investing in professional embroidery digitizing services is not just about getting a file. It is about getting a file that works. It saves you from wasted materials, frustrated operators, and unhappy customers. And honestly, it saves you from a lot of headaches. So the next time you have a design that needs stitching, trust the professionals. Your machine, your fabric, and your sanity will thank you.